Claude
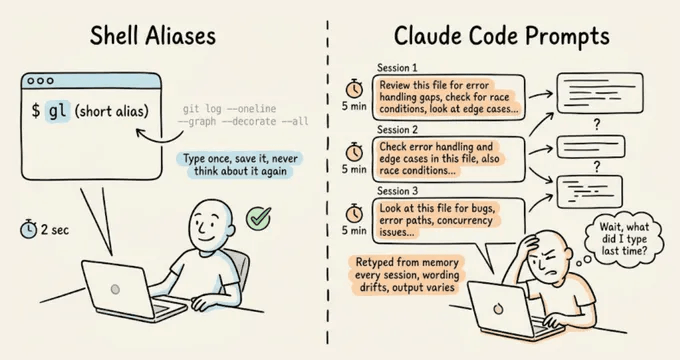
Setting up shell aliases is such a natural part of working in a terminal that most developers do it almost reflexively. If you run a command often enough, you alias it.
With Claude Code prompts, though, devs typically skip this step entirely and keep retyping the same 10-15 line instructions from memory, like their code review checklist, test gen constraints, pre-commit scan...and all this session after session.
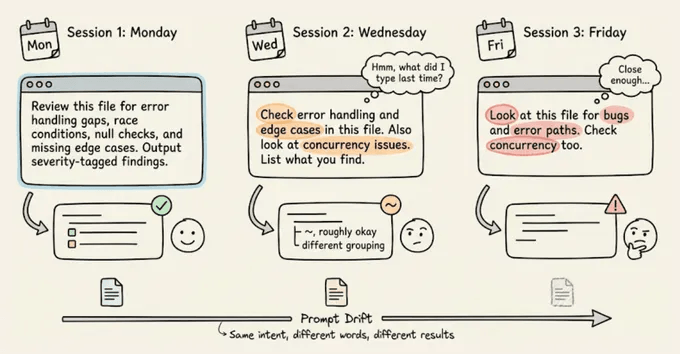
The real cost isn’t just the repetition you do as a dev, but the prompt drift.
Every time you retype a prompt from memory, the wording shifts slightly. For instance, you might forget a constraint or phrase the expected output format differently.
With shell commands, this doesn’t matter because they’re deterministic, but with an LLM, slightly different phrasing may produce noticeably different output.
Claude Code’s custom commands fix both problems.
You can save a markdown file in .claude/commands/, and it becomes a slash command you can invoke with identical instructions every time.
The prompts are version-controlled through Git, so your whole team runs the same commands, and when someone improves a prompt, everyone gets the update on their next pull.
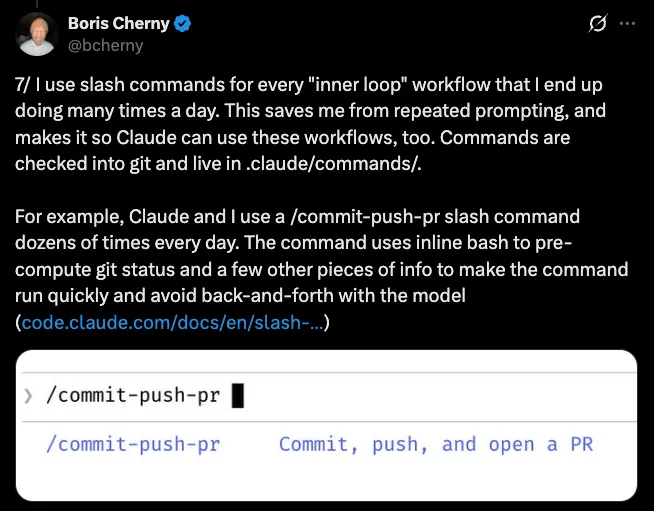
This is the same pattern Boris Cherny described in his thread on Claude Code workflows, where his every repeated workflow becomes a command, checked into Git, and shared with the team:
Let’s walk through how to set them up, then the 10 commands that have been most useful in my workflow. We'll demo each one on a real ML inference service (FastAPI, scikit-learn, Alembic) so you can see the actual output, with full prompt templates you can drop into your own project.
How custom commands work
A custom command is a Markdown file inside a .claude/commands/ directory. The filename becomes the command name.
The file content is the prompt that gets sent to Claude when you run the command. You can use $ARGUMENTS as a placeholder for anything typed after the command name.
For instance, running “/dissect src/auth/session.ts” substitutes $ARGUMENTS with “src/auth/session.ts“.
You can also inject dynamic context using shell commands with the !command syntax:
Claude runs those shell commands before processing the prompt, so the context is always fresh.
Lastly, an optional YAML frontmatter at the top of the file lets you pre-approve tools (so Claude doesn’t ask for permission on every git call), set a model override, or add a description:
That’s the entire system, which includes a markdown file, an optional YAML header, and $ARGUMENTS for dynamic input.
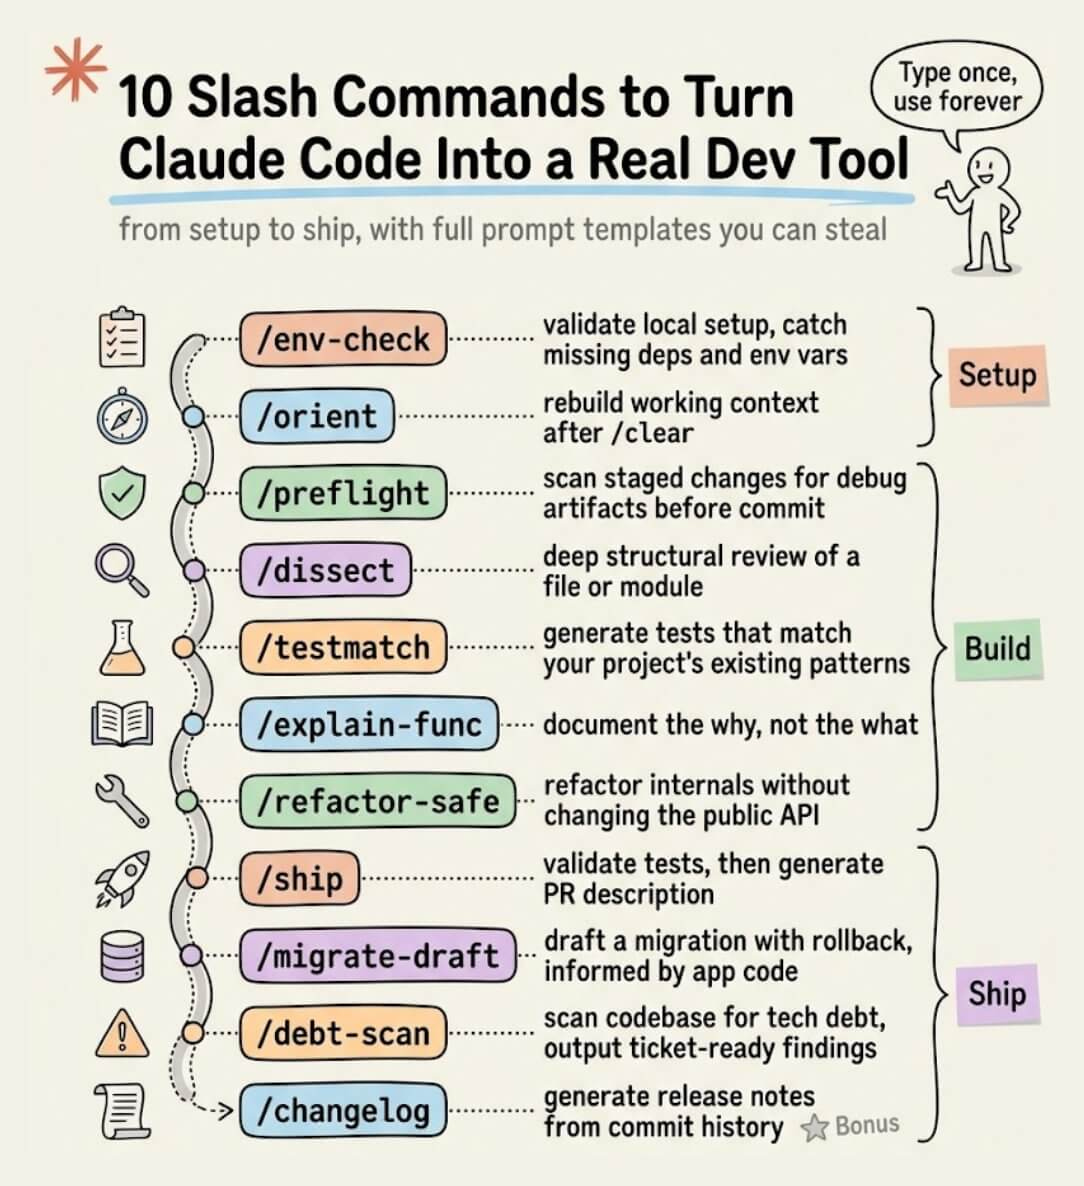
Below are the 10 commands we’ve found most useful in practice:
The newsletter ahead is a bit too long to share over email due to size constraints.
We have shared the full setup guide, with usage videos and prompts here →